This guide takes you through installing AI Poster, connecting your account, creating one content task, and saving an article as a WordPress draft.
Start with one short, focused article so you can inspect the workflow and the result before creating a larger batch.
What you need
- A WordPress site where you can install plugins and access administrator settings.
- WordPress 6.0 or later and PHP 8.0 or later, as specified by the plugin requirements.
- The official AI Poster Client ZIP file.
- An email address you can access for confirmation and account credentials.
- An active connection to the AI Poster service and sufficient plan allowance.
1. Install the plugin
In your WordPress dashboard, open Plugins → Add New Plugin → Upload Plugin. Choose the official AI Poster Client ZIP file, install it, and activate the plugin.
Open AI Poster Client in the admin menu. The connection screen lets you register a new account or connect using existing credentials.
If you already have an AI Poster Client ID and API Key, select Enter credentials and continue to step 3.
2. Register and confirm your email
Choose Register, enter your email address, and select Send code.
Open the email from AI Poster and copy the six-digit confirmation code. Return to the plugin, enter the code, and select Confirm email.
After confirmation, AI Poster sends your Client ID and API Key to the same email address. Keep these credentials private.
3. Connect your WordPress site
On the Client credentials screen, paste the Client ID and API Key from the AI Poster email and select Connect.
These are your AI Poster credentials. Do not paste an OpenAI API key into this form.
Check that the plugin reports a successful connection. Your 3-day trial begins at account registration and allows up to 5 tasks per day. Review your available allowance before creating a task.
Pro costs $12.79 USD per month and allows up to 100 tasks per day. To upgrade, select Upgrade in the plugin and follow Stripe Checkout. If your access has expired or you have exhausted your allowance, resolve that before continuing. Daily task limits do not replace token or image limits.
4. Create one task from a ready title
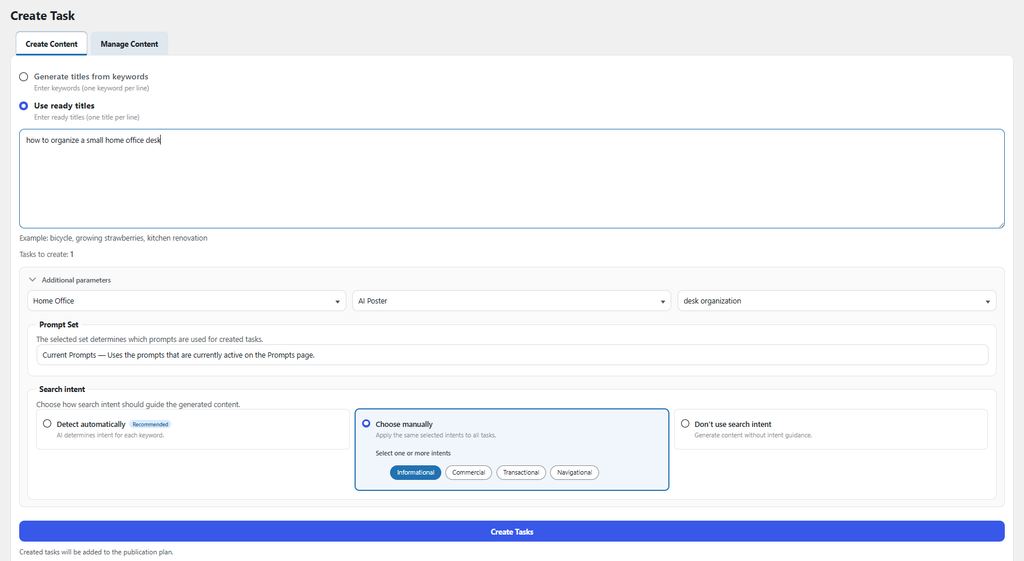
Open AI Poster Client → Tasks and use the Create Content tab.
Select Use ready titles and enter one title. For this walkthrough, use:
How to Organize a Small Home Office Desk
This is an example topic for learning the workflow, not a keyword recommendation or a promise of search traffic. Replace it with a similarly focused topic relevant to your own site if you prefer.
Under Additional parameters:
- Choose the category and author. Add tags if useful.
- Leave Prompt Set on Current Prompts to use the active prompts from the Prompts page, or choose a saved set you have already prepared.
- For this instructional example, choose search intent manually and select Informational. Automatic detection is another available option.
- Select Create Tasks.
Creating a task does not mean that a complete WordPress article already exists. The next steps let you review the plan and then generate the draft.
5. Review the article plan
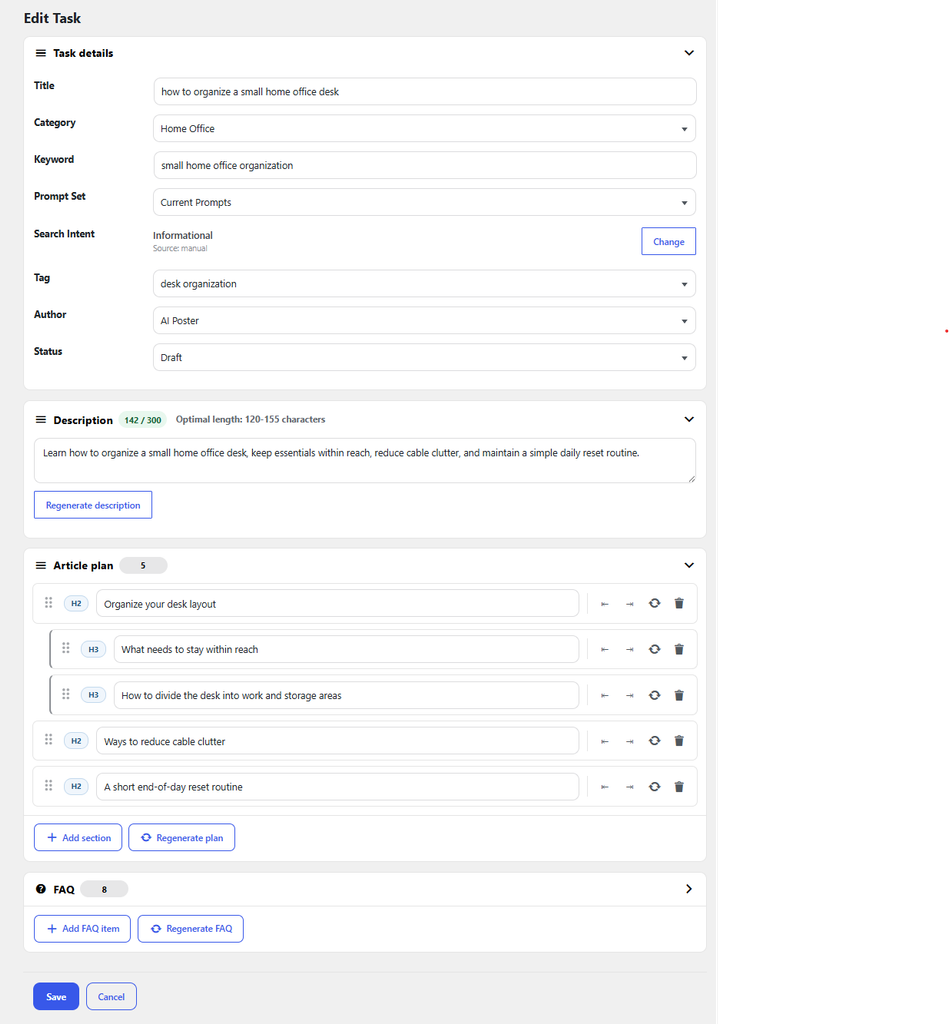
Find the task in the list, open its Actions menu, and select Edit Task.
In Article plan, review the available sections. If the plan is empty, use Generate. Adjust the sections before creating the full article.
For the home-office example, a useful outline could cover:
- What needs to stay within reach.
- How to divide the desk into work and storage areas.
- What needs to stay within reach.
- How to divide the desk into work and storage areas.
- Ways to reduce cable clutter.
- A short end-of-day reset routine.
That outline is an editorial example, not a recorded AI Poster output. Check that your actual plan has a clear sequence and does not repeat the same advice under different headings.
Review the FAQ and description if you want to prepare them now. Image prompts are optional supporting work; you do not need to demonstrate every feature in your first article. Save your task changes.
6. Generate the WordPress draft
Return to the task list, open Actions, and select Create Draft. Confirm the generation request.
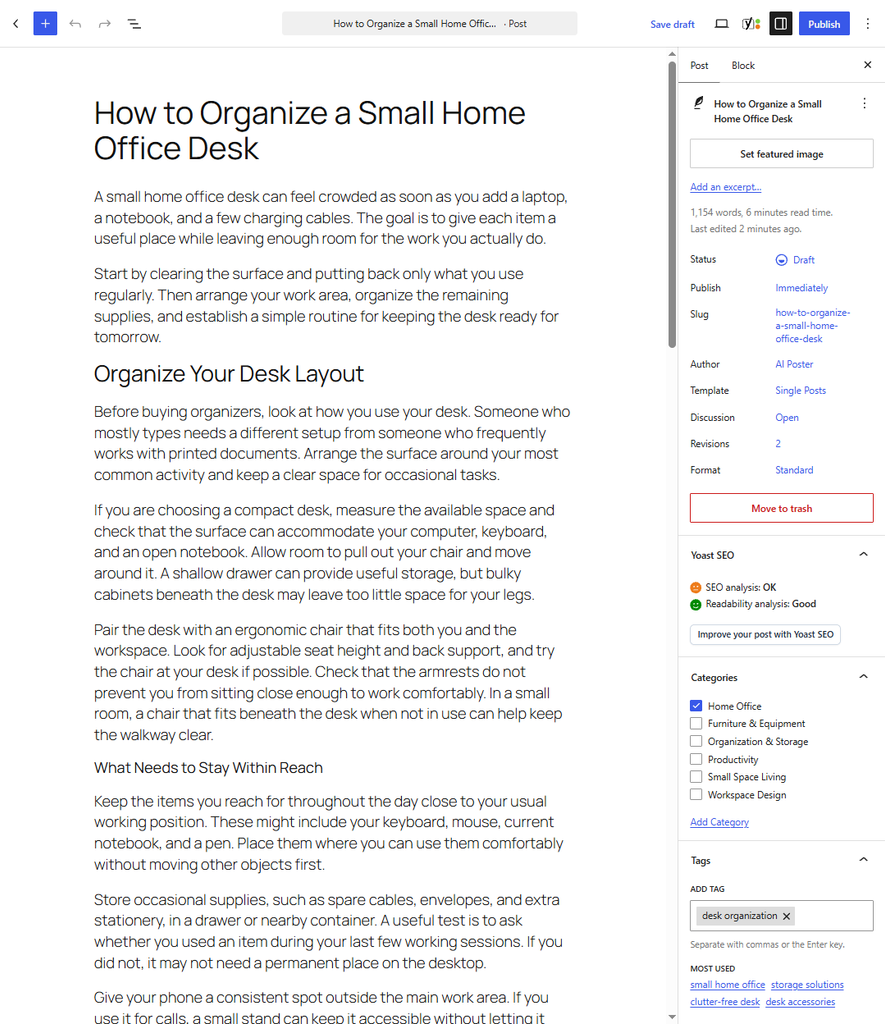
AI Poster generates the article through its service and creates a draft post on your WordPress site. Wait for the completion message and check the task status.
Open Posts → All Posts in WordPress and locate the draft by its title.
7. Edit before publishing
Read the complete draft. Check that it answers the question in the title, uses a sensible structure, and contains no unsupported claims or invented experience.
For the home-office example, replace generic suggestions with details you can stand behind: your actual desk setup, measurements you have taken, or photographs you own.
Check the description in your SEO plugin, add relevant internal links, and inspect the WordPress preview. When you are satisfied, publish through WordPress.
Optional: use AI Content Review
For a generated task linked to a WordPress post, choose Review from the task actions. Select Analyze Article to request an assessment, then inspect the findings before choosing Apply Improvements.
Applying improvements to a draft updates that draft directly, so keep a copy of wording you want to preserve.
To review an older published article, open Manage Content, select the post, choose Review as the task action, and add it to tasks. Open its review screen and analyze it. Create Improved Draft produces a separate draft for review; it does not replace the published article automatically.
If something does not work
I have not received the confirmation email
Check the email address you entered and your spam folder. Registration confirmation and the later credentials email are separate steps. If the code arrives but you do not receive credentials, first confirm that you completed Confirm email successfully.
The credentials do not connect
Check that the Client ID and API Key are both from the AI Poster email. Copy the complete values and check for an error message in the plugin. Do not share the key in public screenshots or support posts.
There are no saved prompt sets
Current Prompts uses the prompts currently active on the Prompts page. You do not need to create a named saved set just to follow this walkthrough. If the interface reports Prompt sets unavailable, that is a loading problem rather than an empty collection; check the connection before continuing.
Generation is blocked
Read the error message and check your account connection and available allowance. Tasks, text generation, and images can be subject to different limits. If the message reports expired access, use the subscription options in the plugin as appropriate.
A task exists, but I cannot find a WordPress draft
Check whether you completed Create Draft and received a success message. Creating a task and creating a post draft are separate actions. If generation failed, inspect the reported error before retrying to avoid unnecessary repeat requests.
Your first successful result
You have completed the workflow when you can open the generated post in the WordPress editor, revise it, and preview it as a draft. Use what you learn from this first article to refine your prompts and the next outline.